Verification Management#
Verification is the process by which requirements are validated against real-world behavior, ensuring that the system conforms to specified needs. In SysGit, each Verification is a formal object that ties Requirements to engineering activities used to confirm compliance—whether through inspection, test, analysis, or demonstration.
SysGit maintains bidirectional traceability between requirements and verifications. When a verification links to requirements:
- Requirements show which verifications validate them
- Verifications track their coverage of requirements
- Changes to either are captured in version control
- Teams can generate verification matrices and reports
Verification Table#
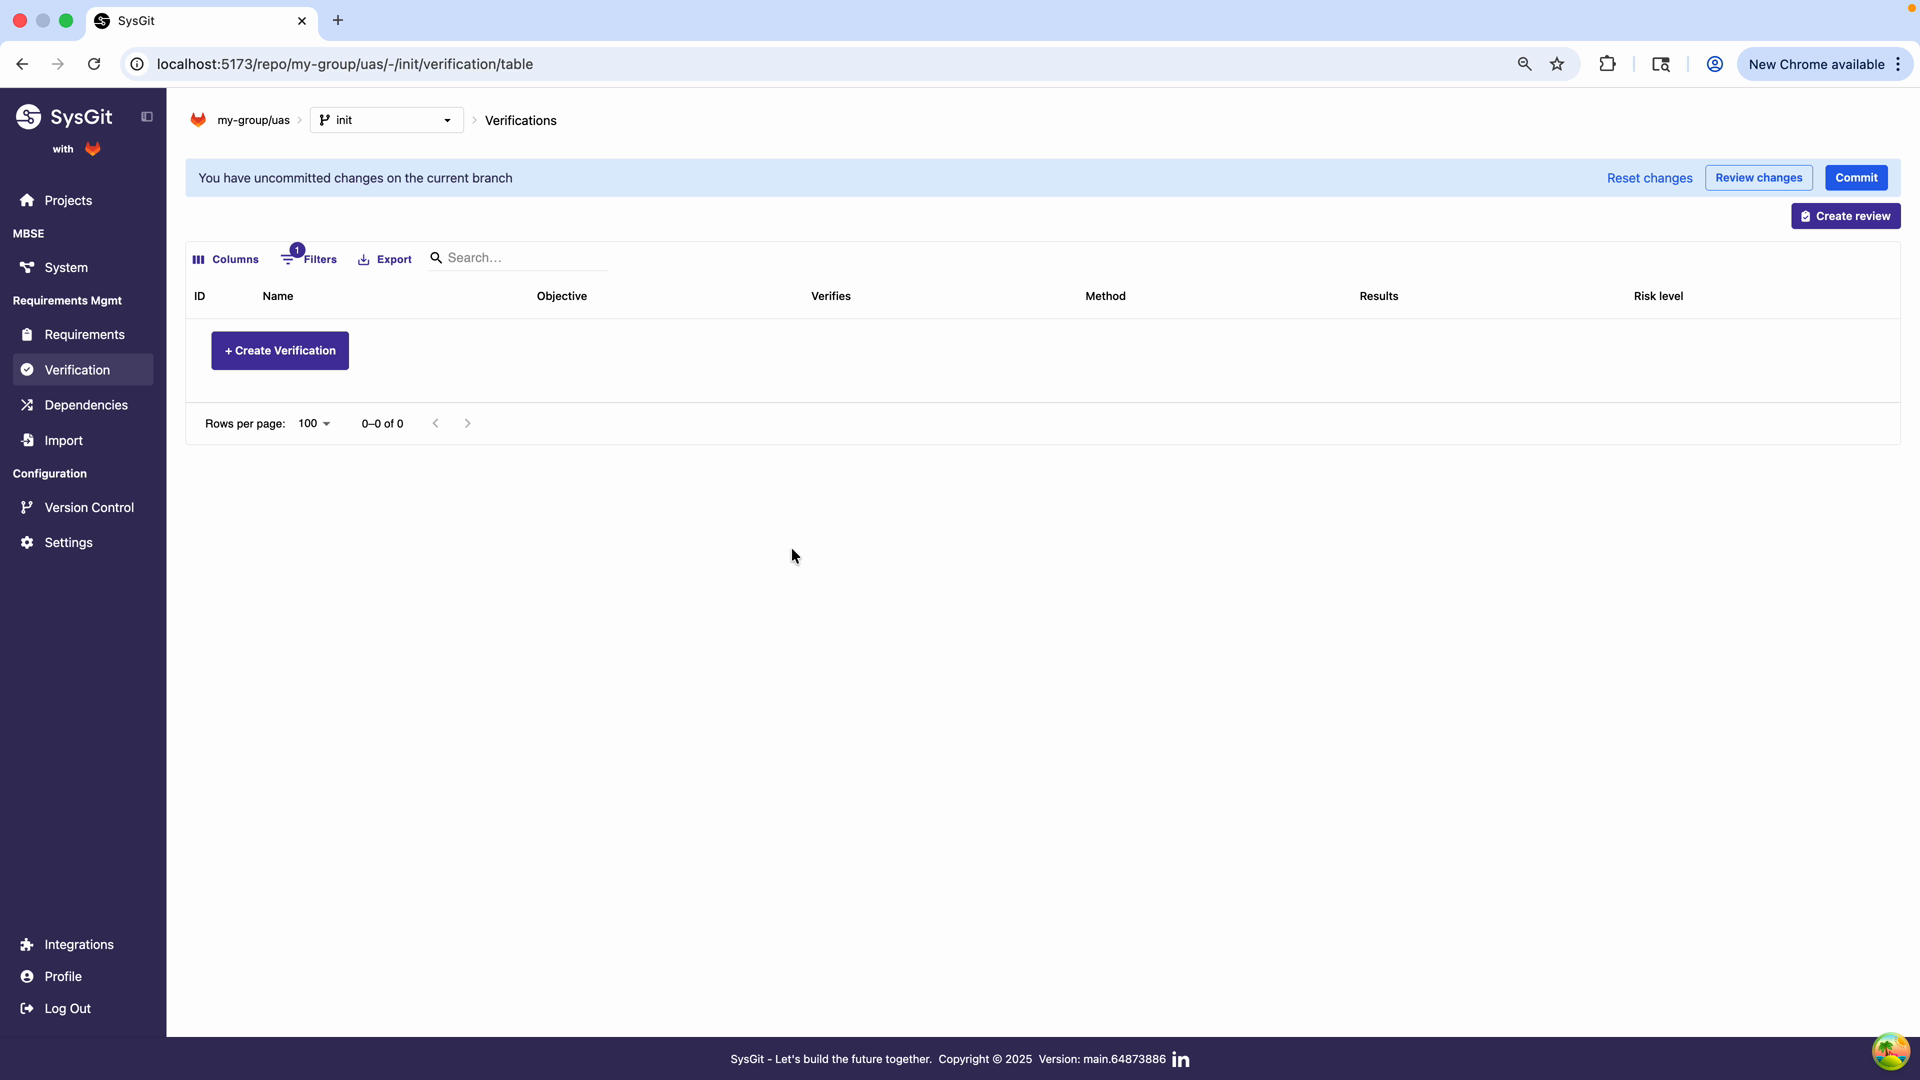
The Verification Table provides a dedicated, streamlined view for managing all verification artifacts in your project. This table-based interface is designed to feel familiar to engineers accustomed to traditional verification matrices while leveraging Git-backed version control.
Access the Verifications module from the left navigation panel under Requirements Mgmt. The interface provides filtering, column management, and export capabilities through the toolbar. The version control integration is indicated by banners showing uncommitted changes on the current branch.
Table Columns#
Each row in the Verification Table represents a single verification activity and includes:
- ID: A unique identifier automatically generated for the verification artifact
- Name: A short, descriptive title of the verification activity (e.g., "Flight Test", "Load Analysis")
- Objective: Describes the purpose and procedure of the verification effort—what is being verified and how
- Verifies: Links to the associated Requirement(s) being verified. Click any requirement link to navigate directly to that requirement in context
- Method: The verification method used (Test, Analyze, Inspect, or Demo)
- Results: Displays the current verification status (Pass, Fail, Inconclusive, Not Run) with color-coded indicators
- Risk Level: A color-coded indicator (Low, Medium, High) allowing engineers to quickly identify high-risk verification efforts requiring additional scrutiny
Working with the Table#
The Verification Table interface provides: - Filtering: Narrow down verifications by method, status, or risk level - Column management: Show/hide columns based on your workflow needs - Export capabilities: Generate verification matrices for reporting - Interactive links: Click requirement names to view full requirement details - Version control integration: Commit button and branch indicators show uncommitted changes
This view allows Systems Engineers and QA stakeholders to assess verification coverage, identify critical areas requiring deeper scrutiny, and maintain the documentation trail necessary for system certification.
Creating a Verification#
Step 1: Create a New Verification#
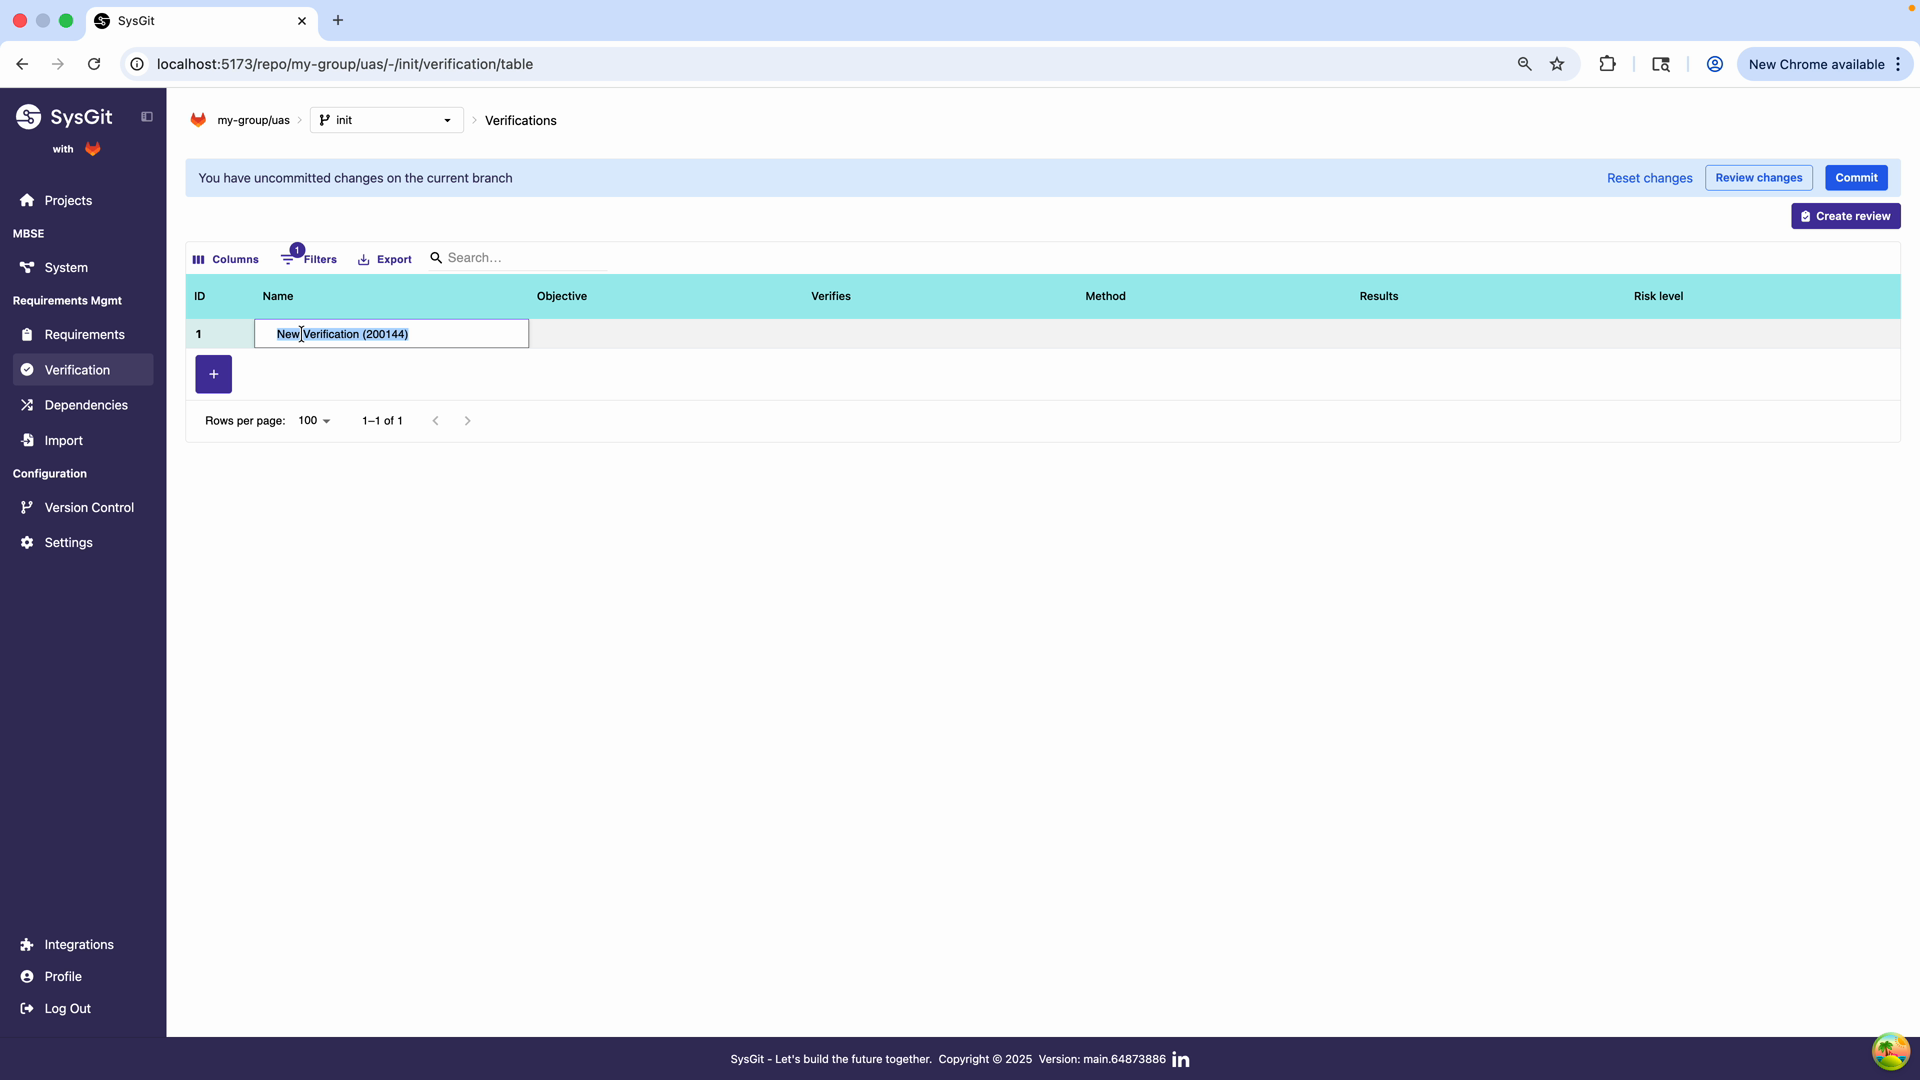
Click the + Create Verification button in the Verification Table toolbar. The system automatically generates a new row with a default identifier. The verification is created in an editable state, allowing immediate configuration.
Step 2: Define the Name#
Enter a descriptive name for the verification in the Name field. In this example, we name it "Flight Test" to reflect the nature of the verification activity. Good verification names are: - Action-oriented: "Flight Test", "Structural Load Analysis", "Power Consumption Test" - Specific enough: Clearly identifies what's being verified without being overly verbose - Consistent: Follow your organization's naming conventions
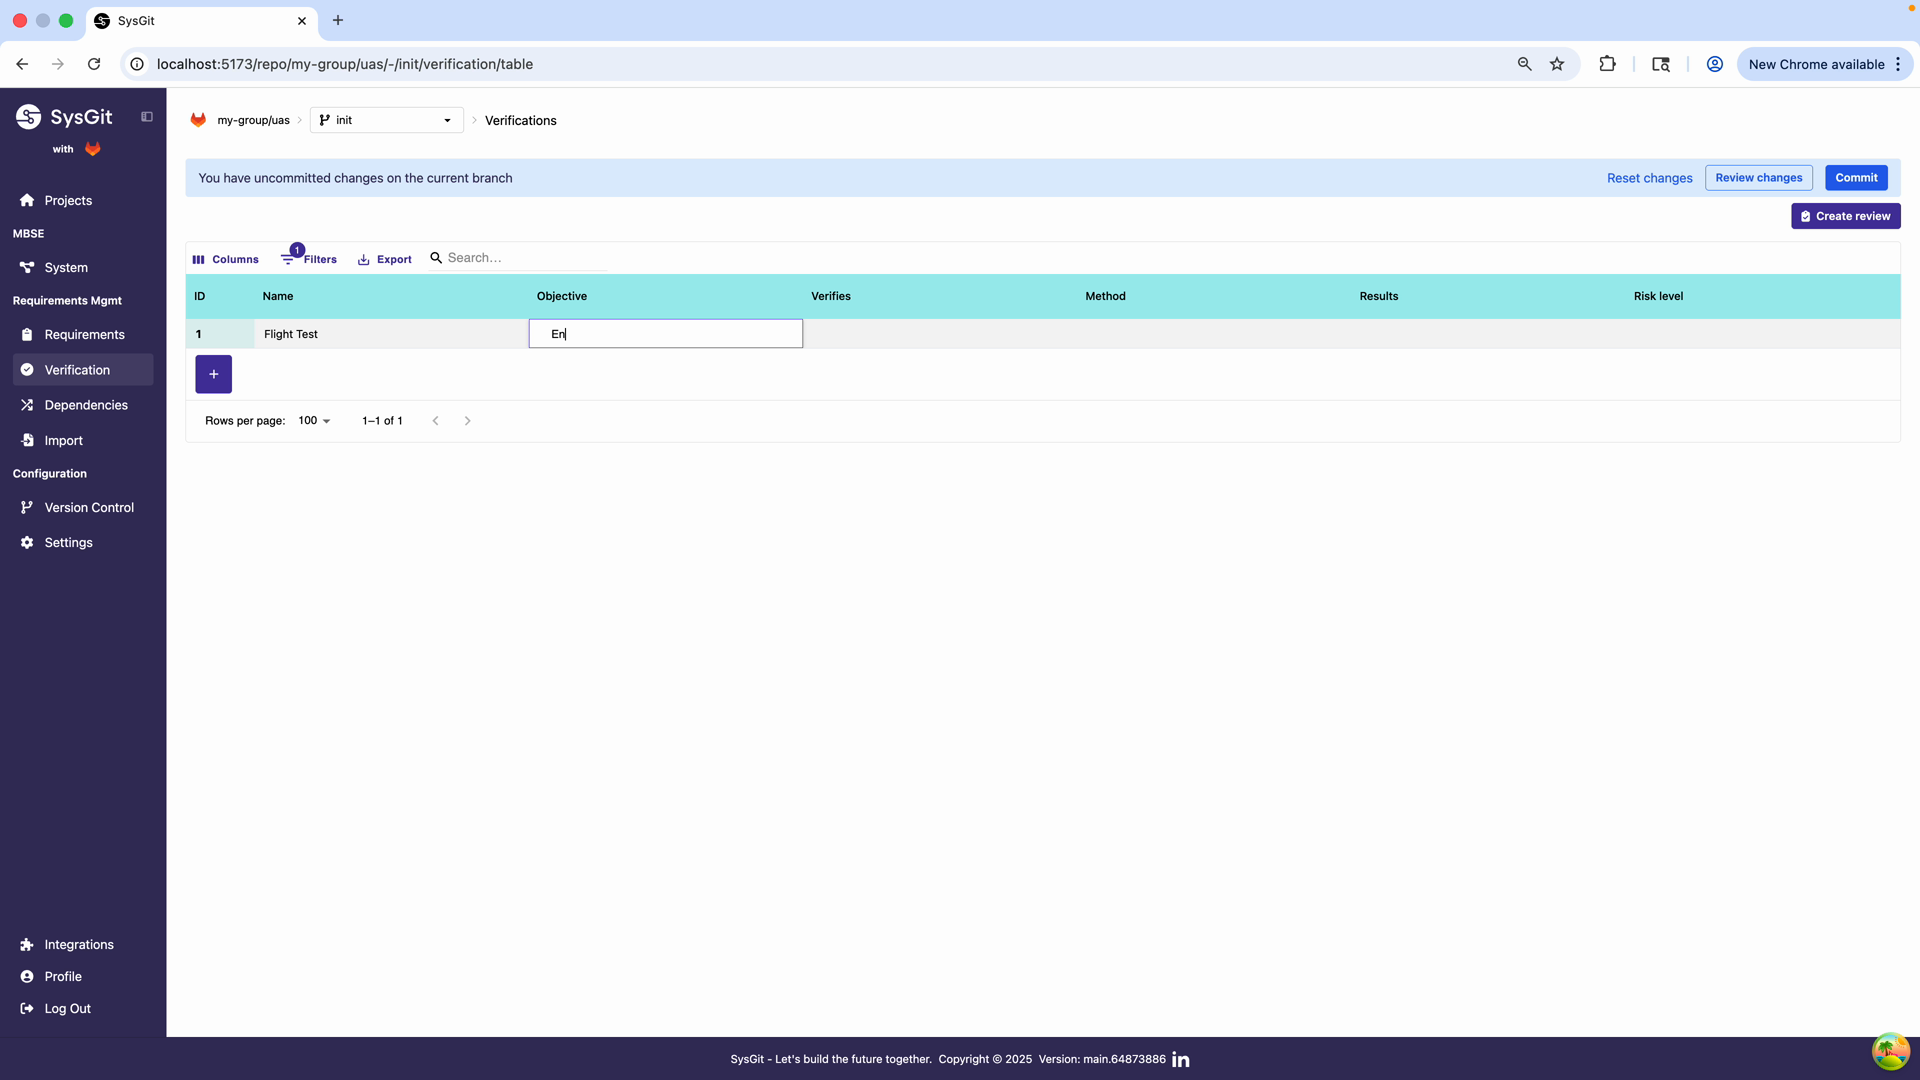
Step 3: Write the Objective#

Define the objective of the verification in the Objective field. For this example, we enter "Ensure vehicle can fly correctly considering the requirements." A well-written objective: - States the verification goal in measurable or observable terms - References the system or component being verified - Connects explicitly to the requirements being validated - Provides sufficient context for test planning and execution
Example:
"Verify maximum cruise speed through flight test at design altitude under standard atmospheric conditions."
Step 4: Select Verification Method#
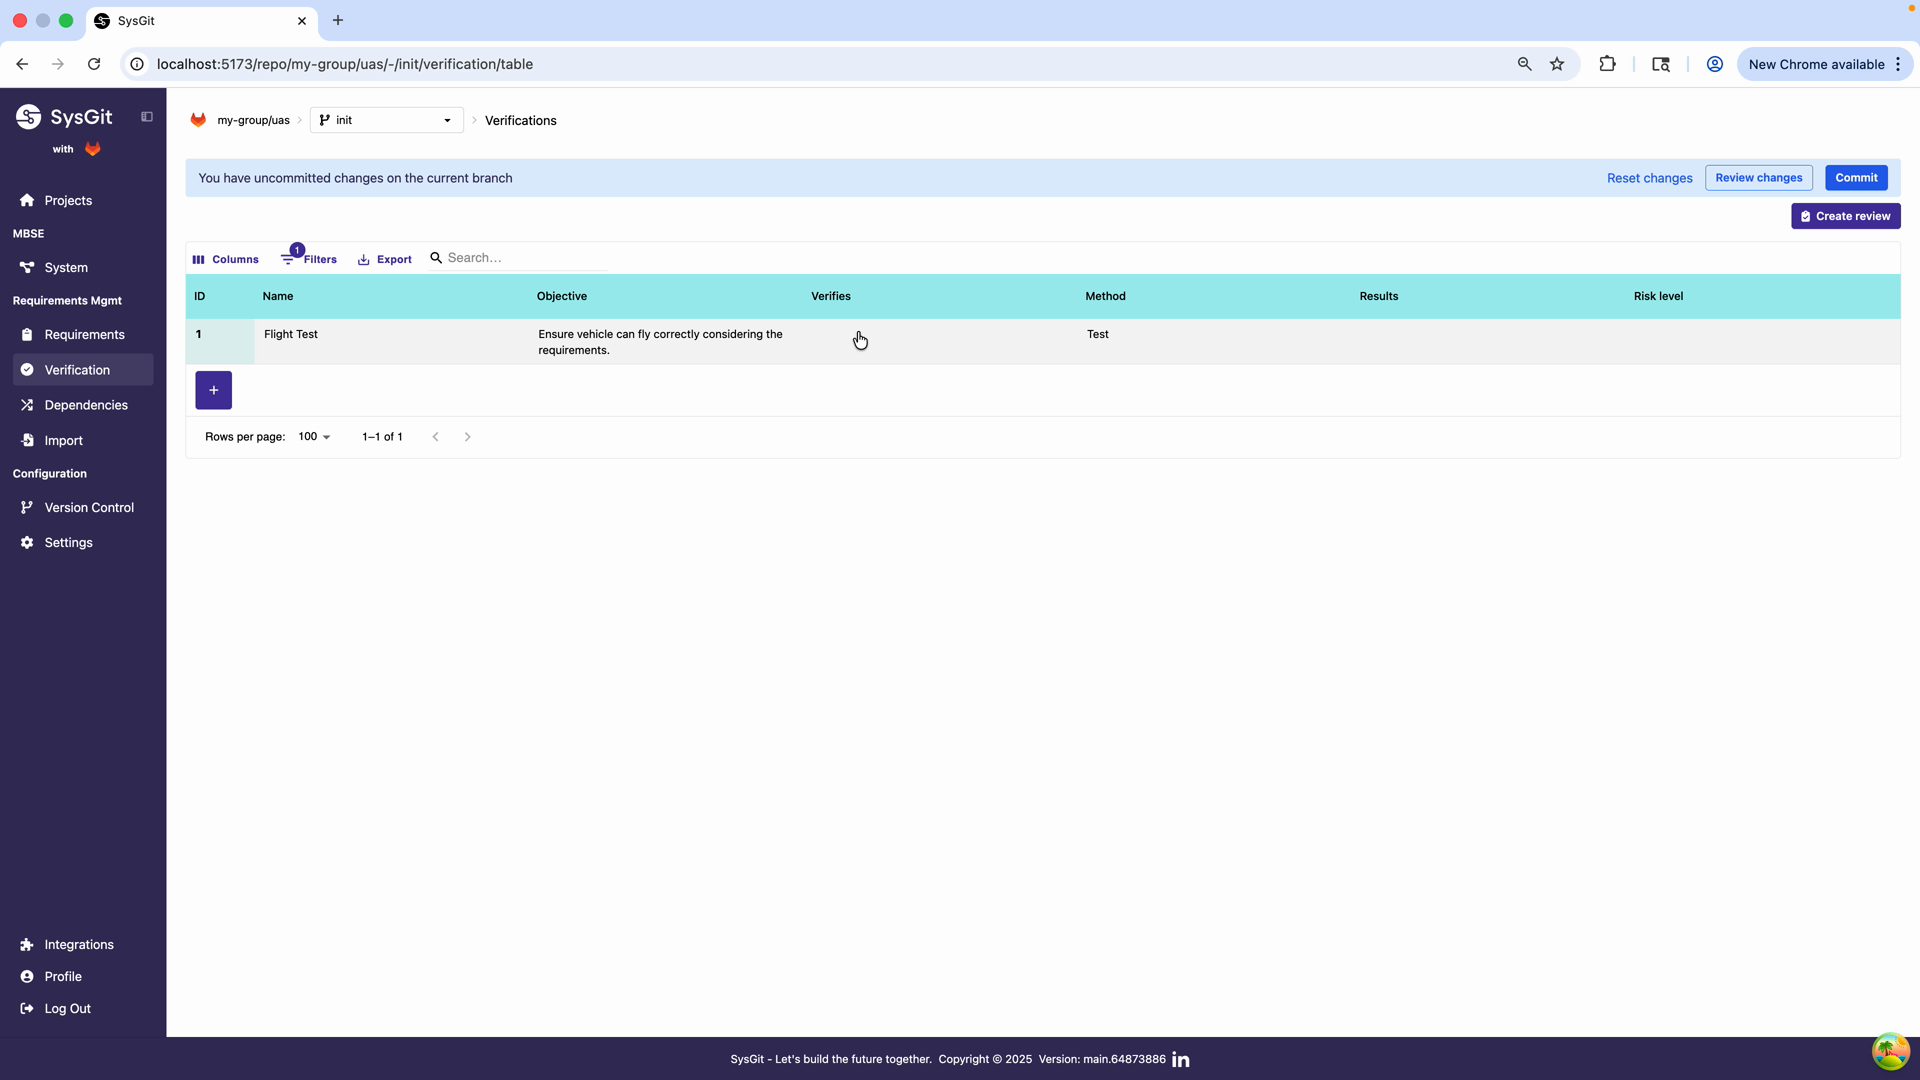
Choose the appropriate verification method from the Method dropdown:
- Test: Physical or functional testing of the system
- Analyze: Mathematical or computational analysis
- Inspect: Visual or measurement-based examination
- Demonstrate: Operational demonstration of capabilities
See Verification Methods below for detailed guidance on when to use each method.
Step 5: Link Requirements#
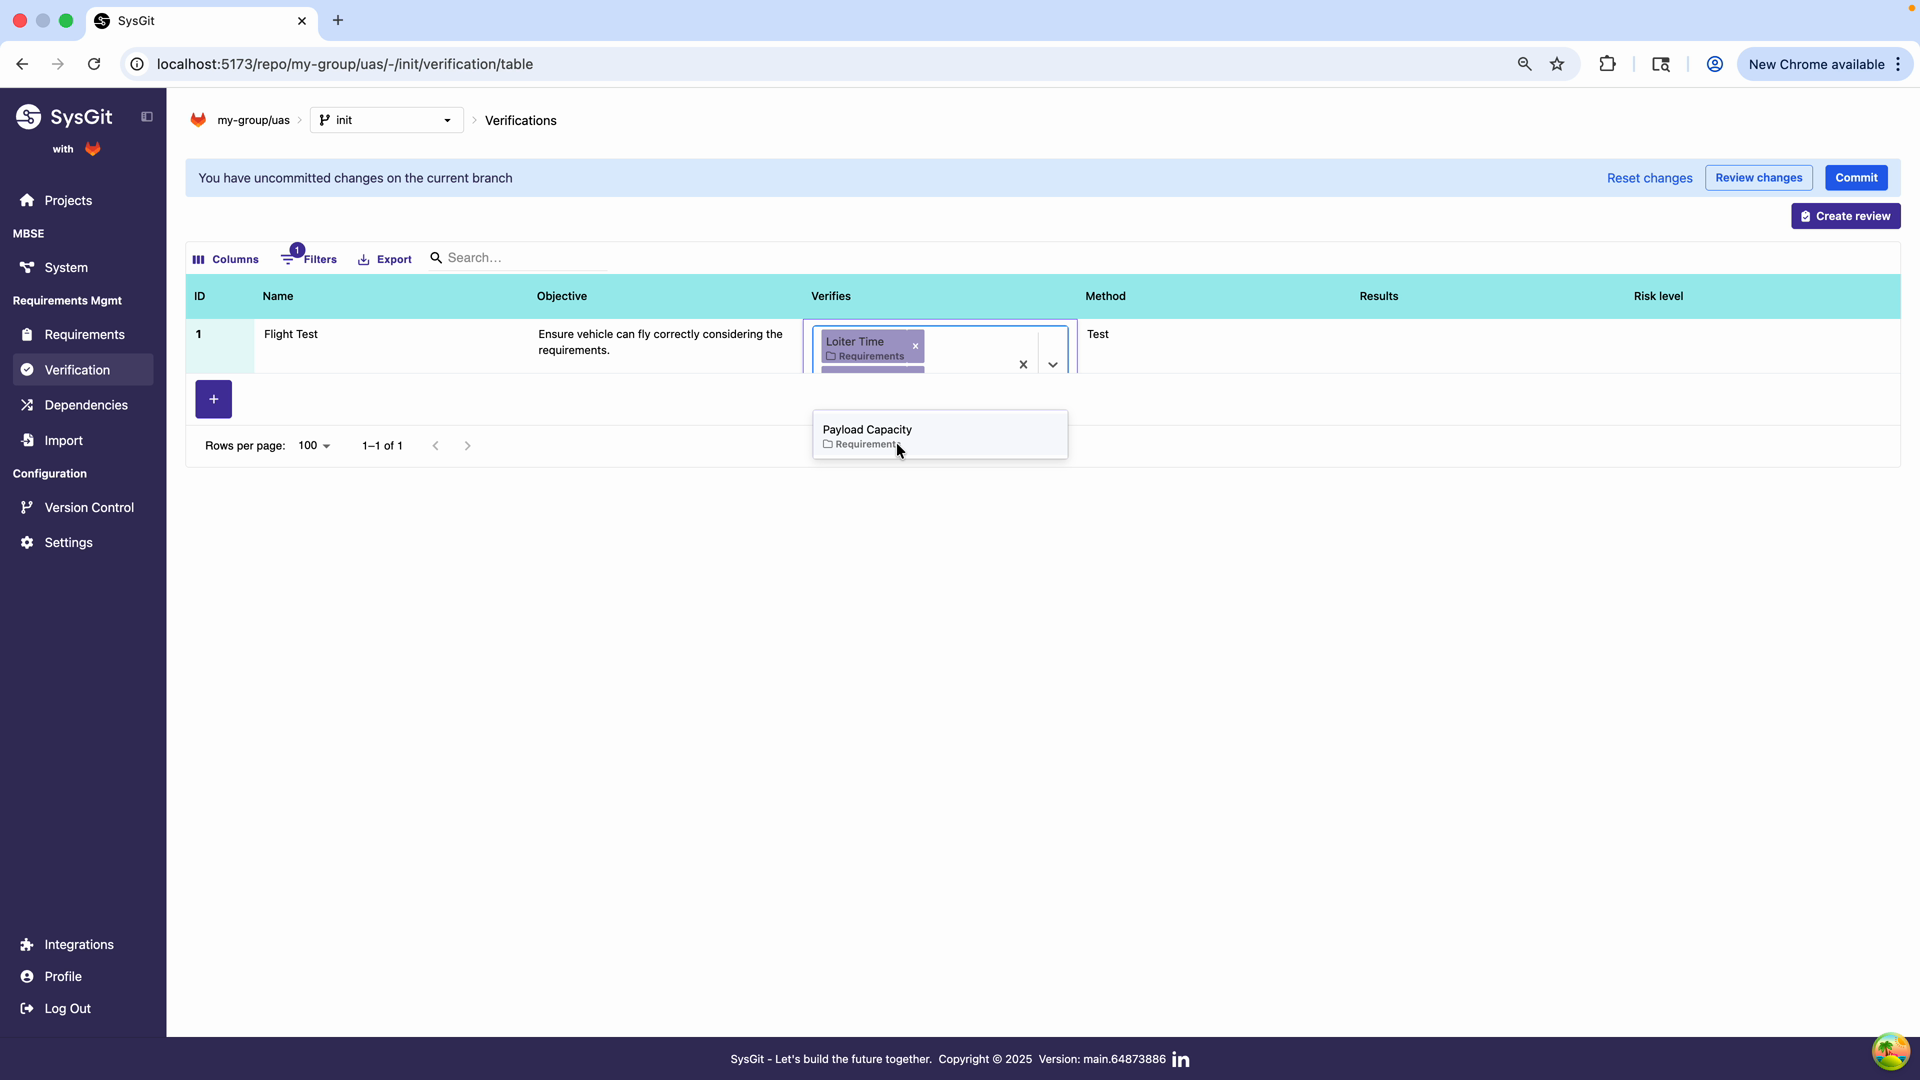
Click in the Verifies field to open the requirement selection interface. This dialog displays all available requirements in the project with their documentation and attributes.
Select all requirements that this verification activity will validate: - Loiter Time - Verifies the vehicle's endurance capability - Fuel Type - Validates fuel system compatibility - Payload Capacity - Confirms payload handling specifications
The selection interface shows requirement details including documentation and attributes, helping you make informed selections.

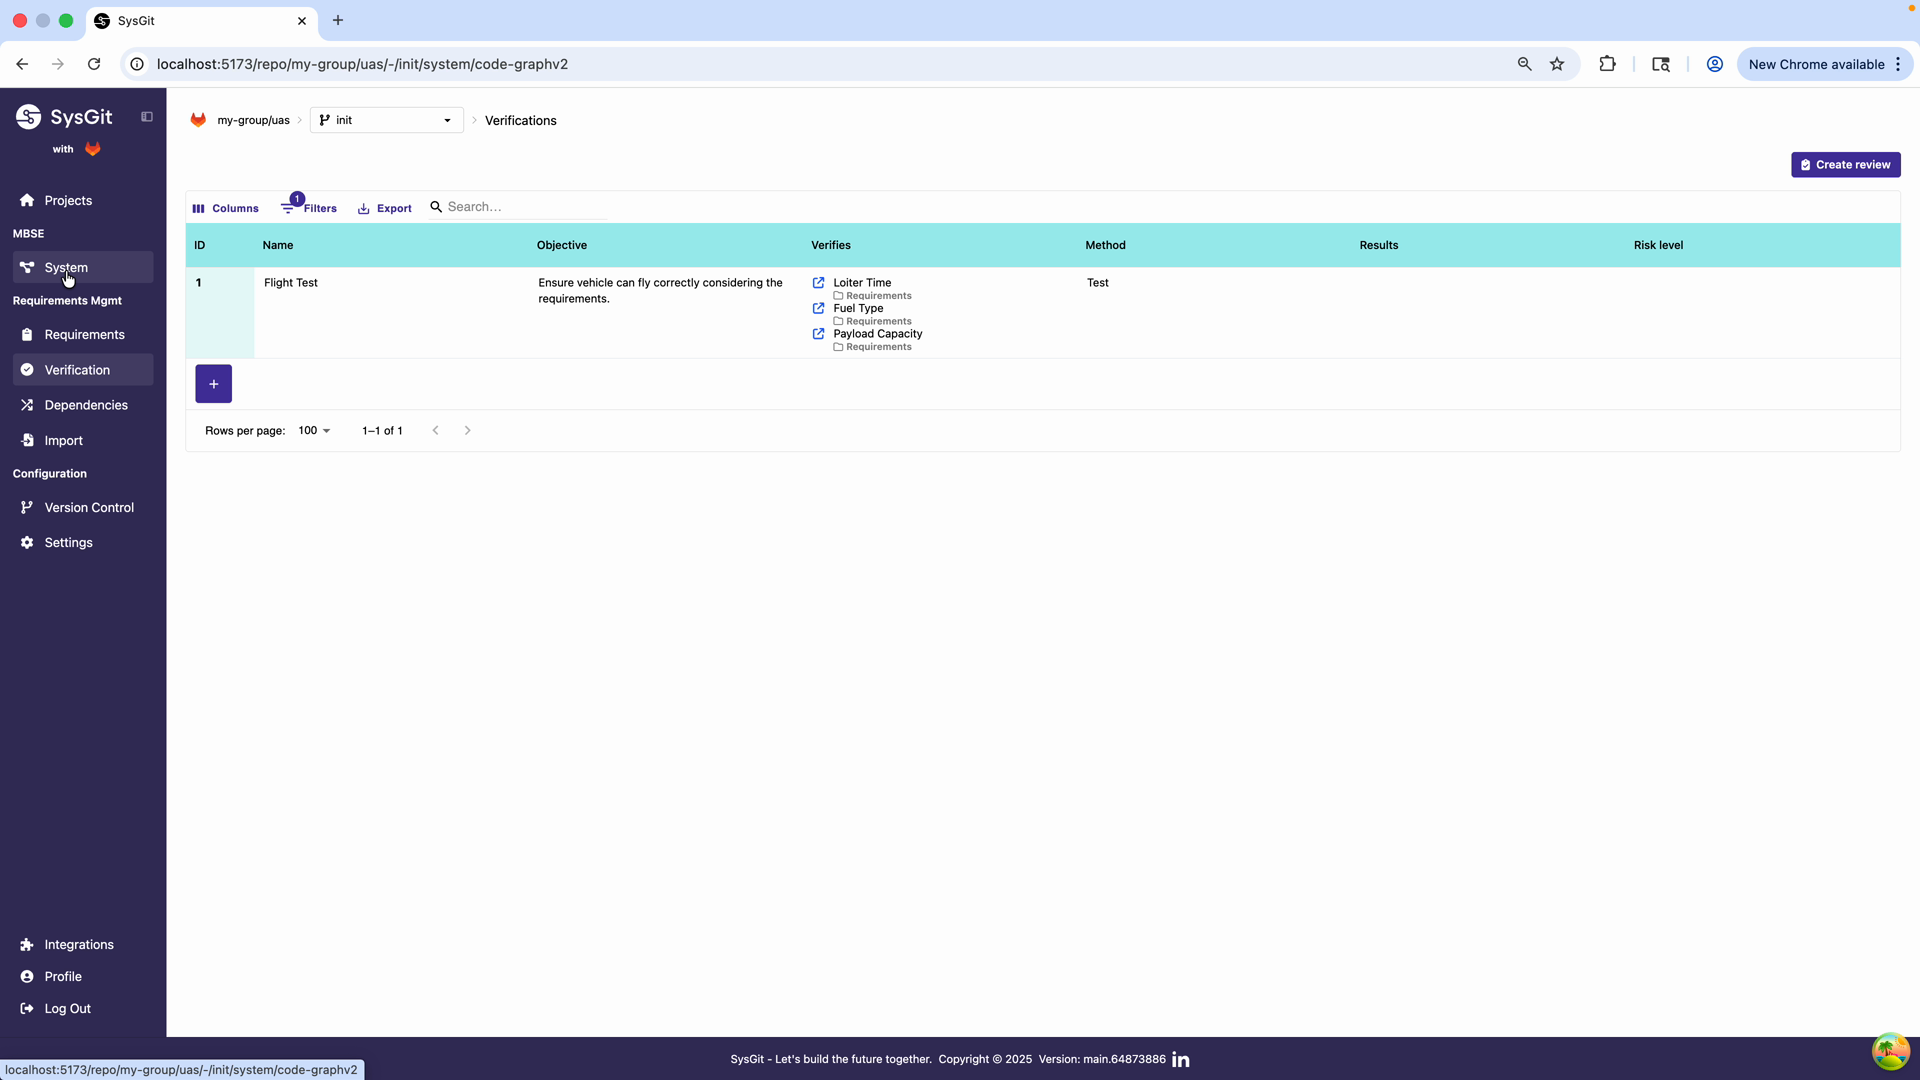
After selecting requirements, the Verifies column displays links to each associated requirement. Each link shows: - The requirement name - The parent requirement category (e.g., "Requirements") - A visual indicator showing the verification relationship
This traceability matrix ensures that all stakeholders can clearly see which requirements are covered by each verification activity.
Best Practice: A single verification can—and often should—verify multiple related requirements to avoid duplication. Consolidate verification activities whenever possible. Instead of creating separate verifications for each requirement, group related requirements under a single verification activity that efficiently validates all of them.
Step 6: Commit the Verification#
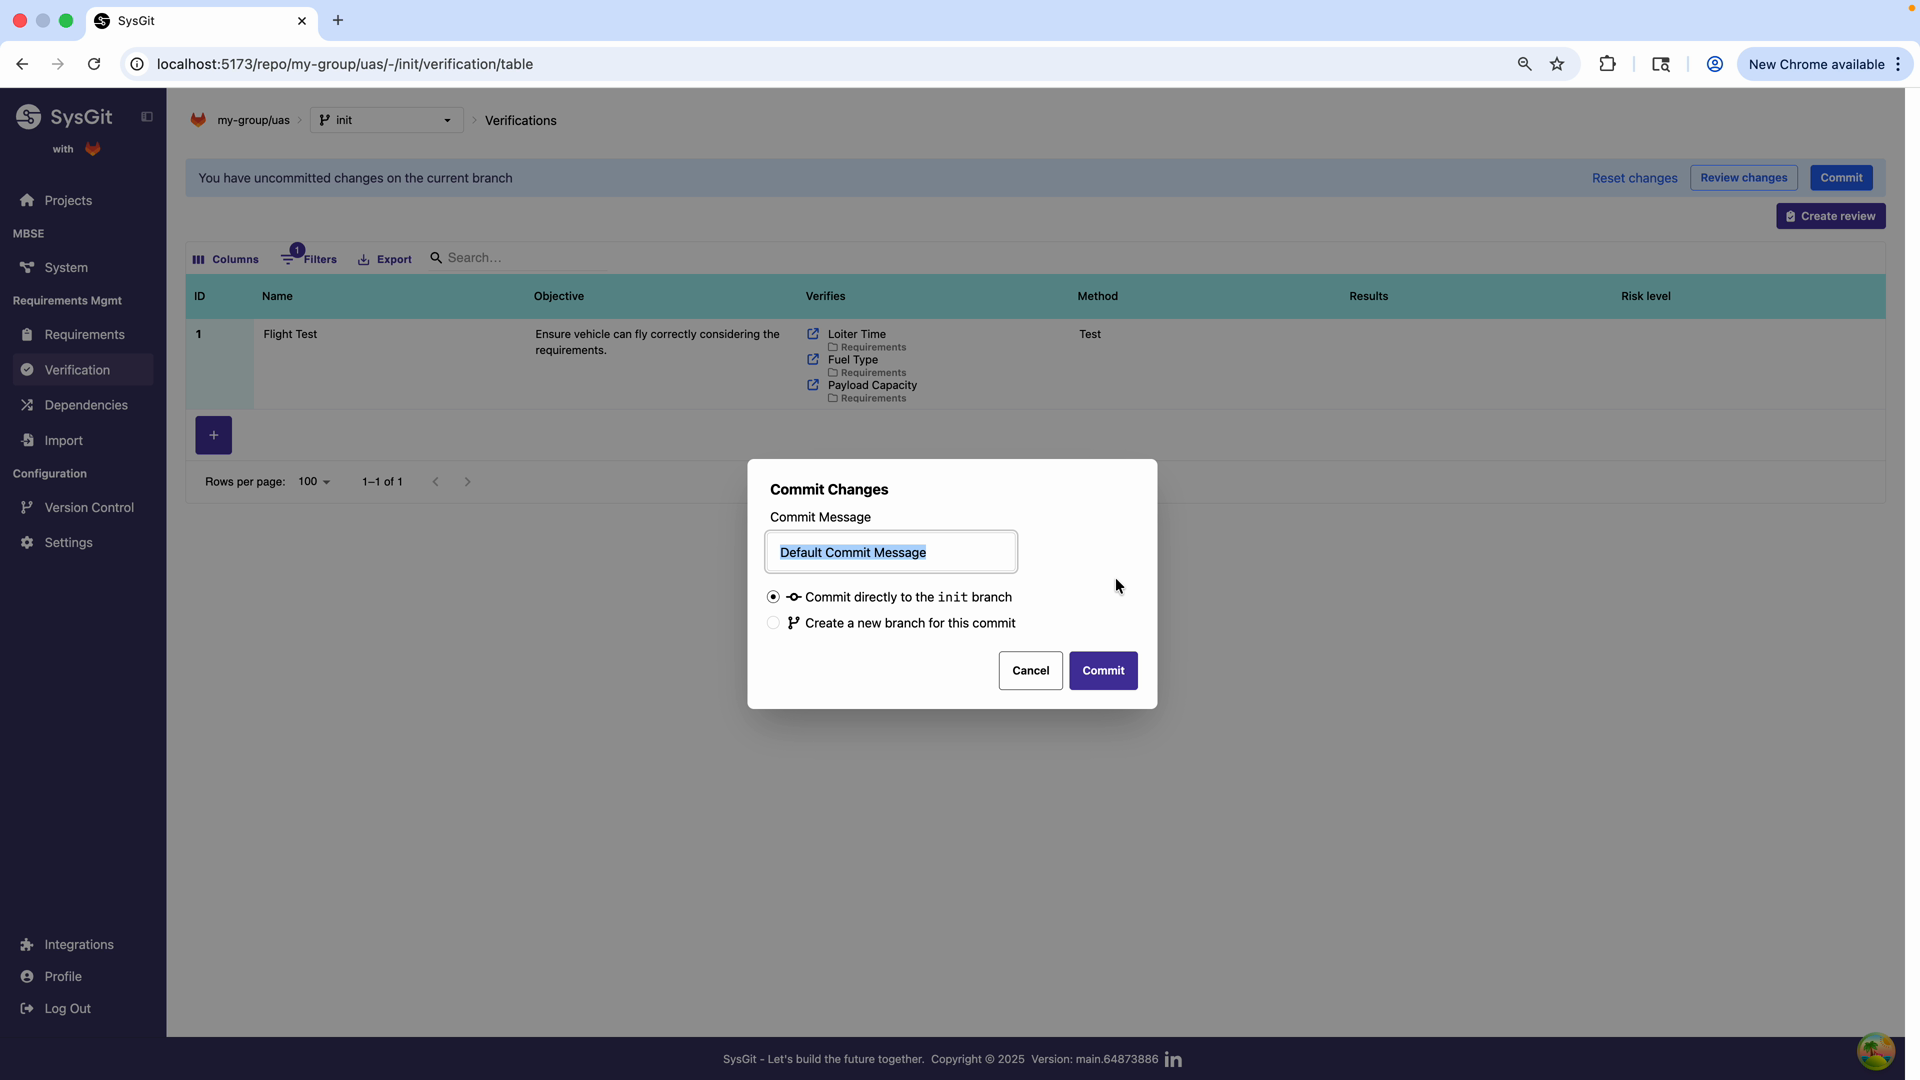
Click the Commit button in the toolbar to persist the verification to the repository. The commit dialog allows you to: - Customize the commit message - Choose to commit directly to the current branch or create a new branch for review
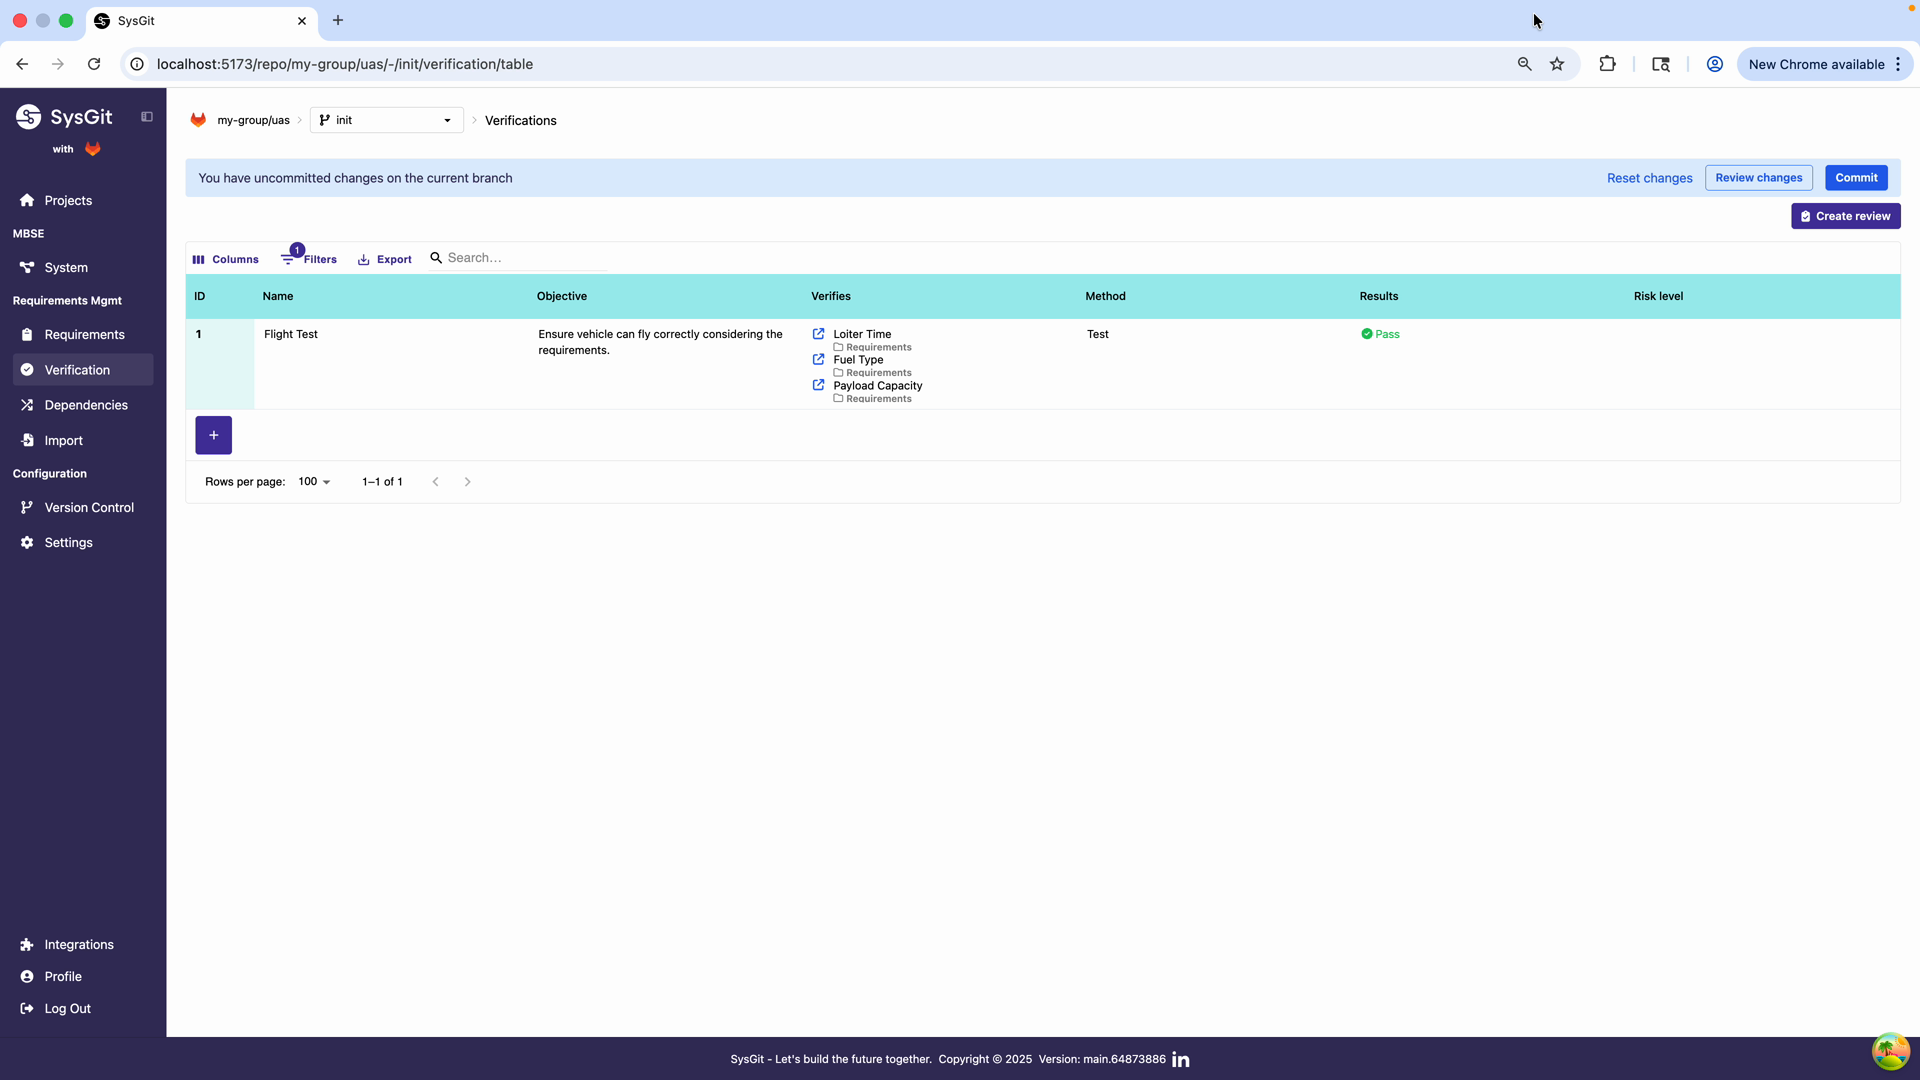
After committing, the verification appears in the table with all configured properties. The interface confirms the successful commit and removes the "uncommitted changes" notification. The verification is now part of the project's permanent record and can be referenced by other system elements.
Verification Methods#
SysGit supports four standard verification methods aligned with systems engineering practice:
Test#
When to use Test:
- Physical testing is required to validate functionality
- Operational testing under actual or simulated conditions
- Hardware-in-the-loop or system integration testing
- Performance measurements under controlled conditions
- Qualification or acceptance testing
Examples:
- Flight test to verify cruise speed and endurance
- Load testing of structural components
- Environmental testing (temperature, vibration, humidity)
- Electromagnetic compatibility testing
- Functional testing of avionics systems
Characteristics:
- Most resource-intensive method
- Provides highest confidence for hardware systems
- Requires test facilities, equipment, and procedures
- Results in empirical data and test reports
Analyze#
When to use Analyze:
- Requirements can be verified through calculation or simulation
- Physical testing is impractical or cost-prohibitive
- Early verification before hardware availability
- Trade studies and sensitivity analysis
- Mathematical proof of compliance
Examples:
- Finite element analysis of structural strength
- Computational fluid dynamics for aerodynamic performance
- Thermal analysis of cooling systems
- Link budget analysis for communication systems
- Probabilistic risk assessment
Characteristics:
- Cost-effective compared to physical testing
- Can be performed early in development
- Requires validated models and analysis methods
- Results depend on model fidelity and assumptions
Inspect#
When to use Inspect:
- Requirements relate to physical characteristics or design features
- Verification through examination or measurement
- Document review and audit
- Design conformance checking
- Interface compatibility verification
Examples:
- Dimensional inspection of mechanical parts
- Visual inspection of workmanship
- Review of technical documentation
- Verification of software architecture against design requirements
- Inspection of manufacturing processes
- Cable routing and connector inspection
Characteristics:
- Relatively simple and low-cost
- Provides immediate feedback
- Suitable for design and implementation requirements
- May require specialized inspection equipment or expertise
Demonstrate#
When to use Demonstrate:
- Requirements describe operational capabilities
- Verification through functional demonstration
- User-facing features and workflows
- Operational scenarios and use cases
- Proof-of-concept validation
Examples:
- Demonstration of mission profile execution
- User interface usability demonstration
- Training effectiveness demonstration
- Emergency procedure demonstration
- System startup and shutdown procedures
Characteristics:
- Focuses on operational use rather than detailed measurements
- Often performed for customer or stakeholder review
- Less rigorous than formal testing
- Effective for capability and workflow requirements
Managing Verification Results#
Updating Verification Status#
After executing a verification activity, update the Results field to reflect the outcome:
- Pass: Verification successful, requirements validated
- Fail: Verification unsuccessful, requirements not met
- Inconclusive: Results cannot definitively validate requirements
- Not Run: Verification not yet executed
The status field uses color-coded indicators: - Green (Pass): Requirements satisfied - Red (Fail): Requirements not satisfied, corrective action needed - Yellow (Inconclusive): Further investigation required - Gray (Not Run): Verification pending
Linking to External Artifacts#
Verification results often reference external documentation:
- Test reports and data logs
- Analysis reports and simulation results
- Inspection records and photographs
- Demonstration videos or presentation materials
While SysGit stores verification definitions in Git repositories, large binary artifacts (test data, videos, CAD files) should be stored in appropriate external systems with references documented in the verification objective or through integration with your document management system.
Tracking Verification Progress#
Use the Verification Table to monitor verification campaign progress:
- Filter by "Not Run" to see pending verifications
- Sort by Risk Level to prioritize high-risk items
- Export verification matrices for status reports
- Review verification coverage through the system graph view
Verification Coverage and Traceability#
Viewing Verification in the System Graph#
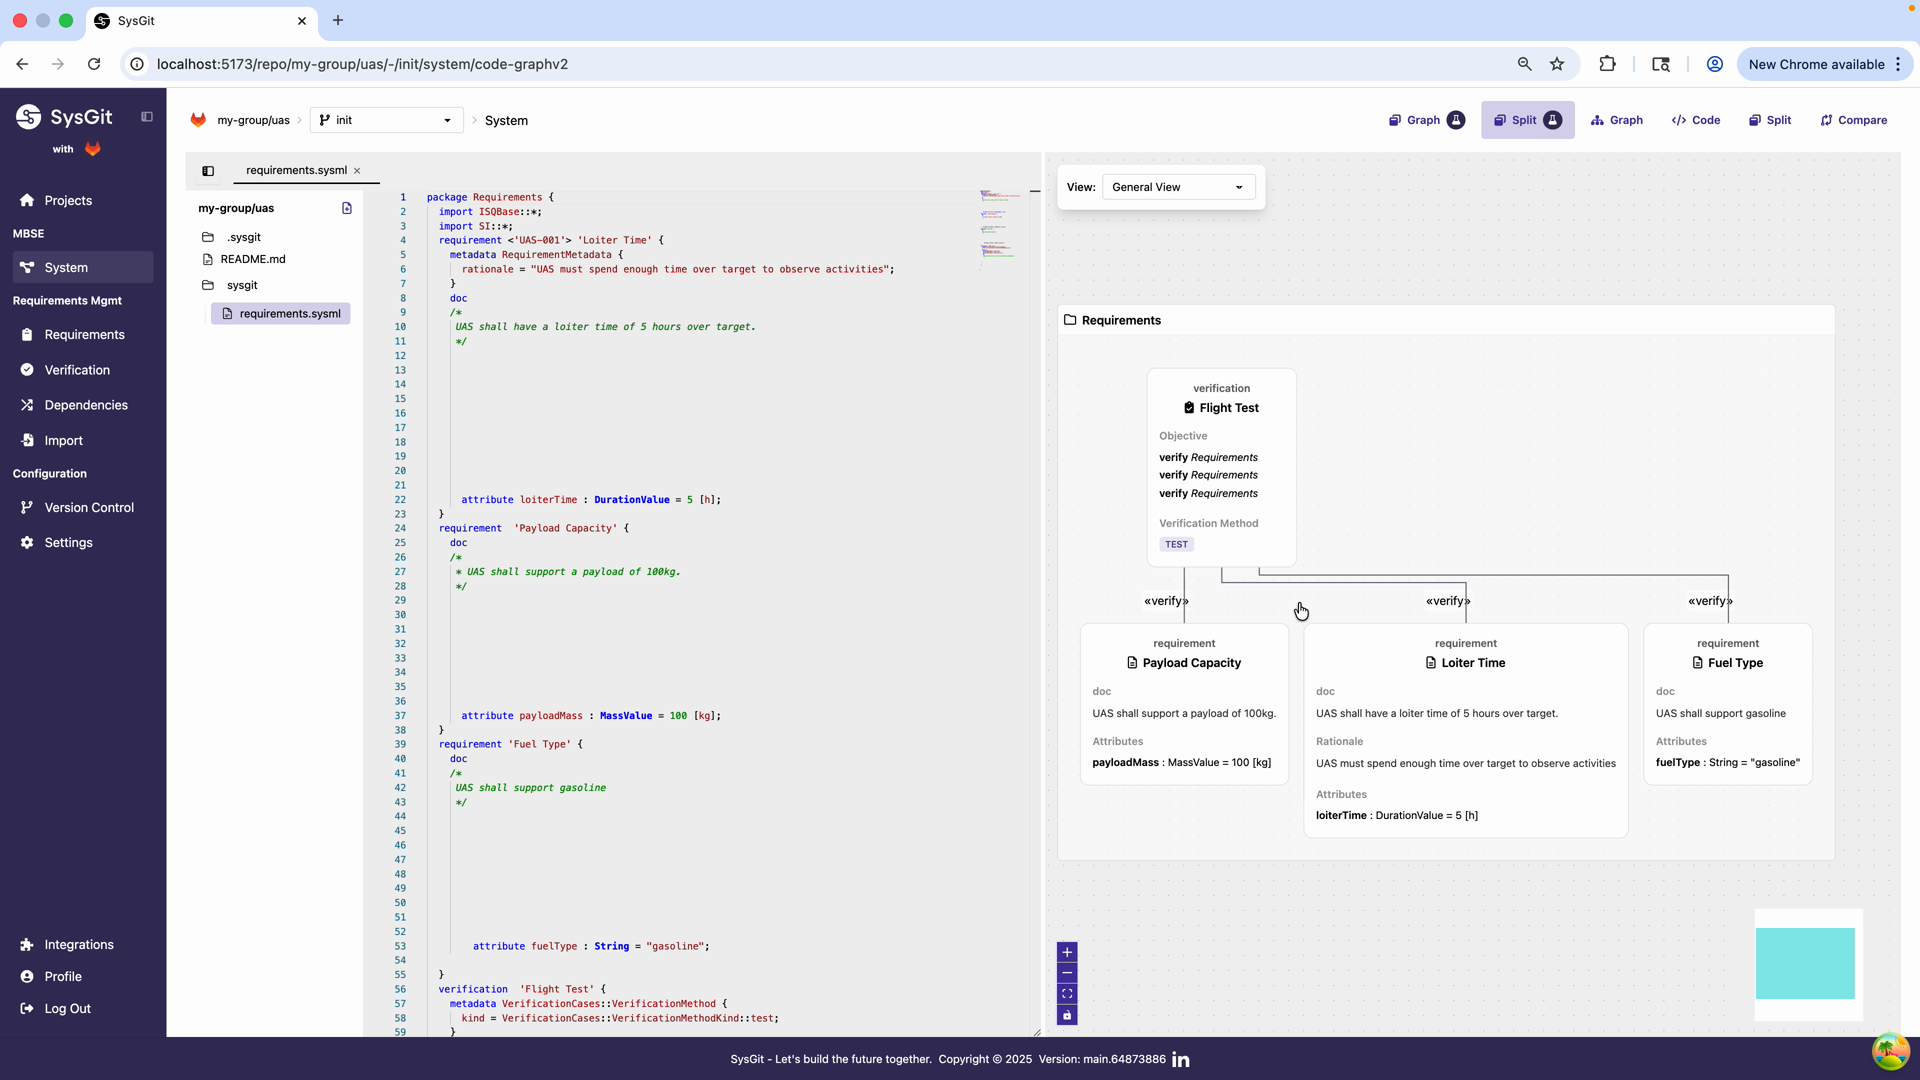
Navigate to the System view using the left navigation panel or by clicking the Graph button in the top toolbar. The system graph provides a visual representation of verification relationships. The graph displays:
- Verification objects as nodes
- "Verify" relationships connecting verifications to requirements
- Hierarchical structure showing requirement decomposition
- Color-coded elements for different object types
The graph visualization clearly shows the "verify" relationships between the Flight Test verification and the three linked requirements. Each relationship is represented by a labeled edge connecting the verification node to each requirement node.
This visualization helps teams:
- Quickly assess verification coverage
- Identify requirements without verification
- Understand the verification strategy
- Communicate verification plans to stakeholders
The graph can be filtered, zoomed, and configured to focus on specific aspects of the verification architecture.
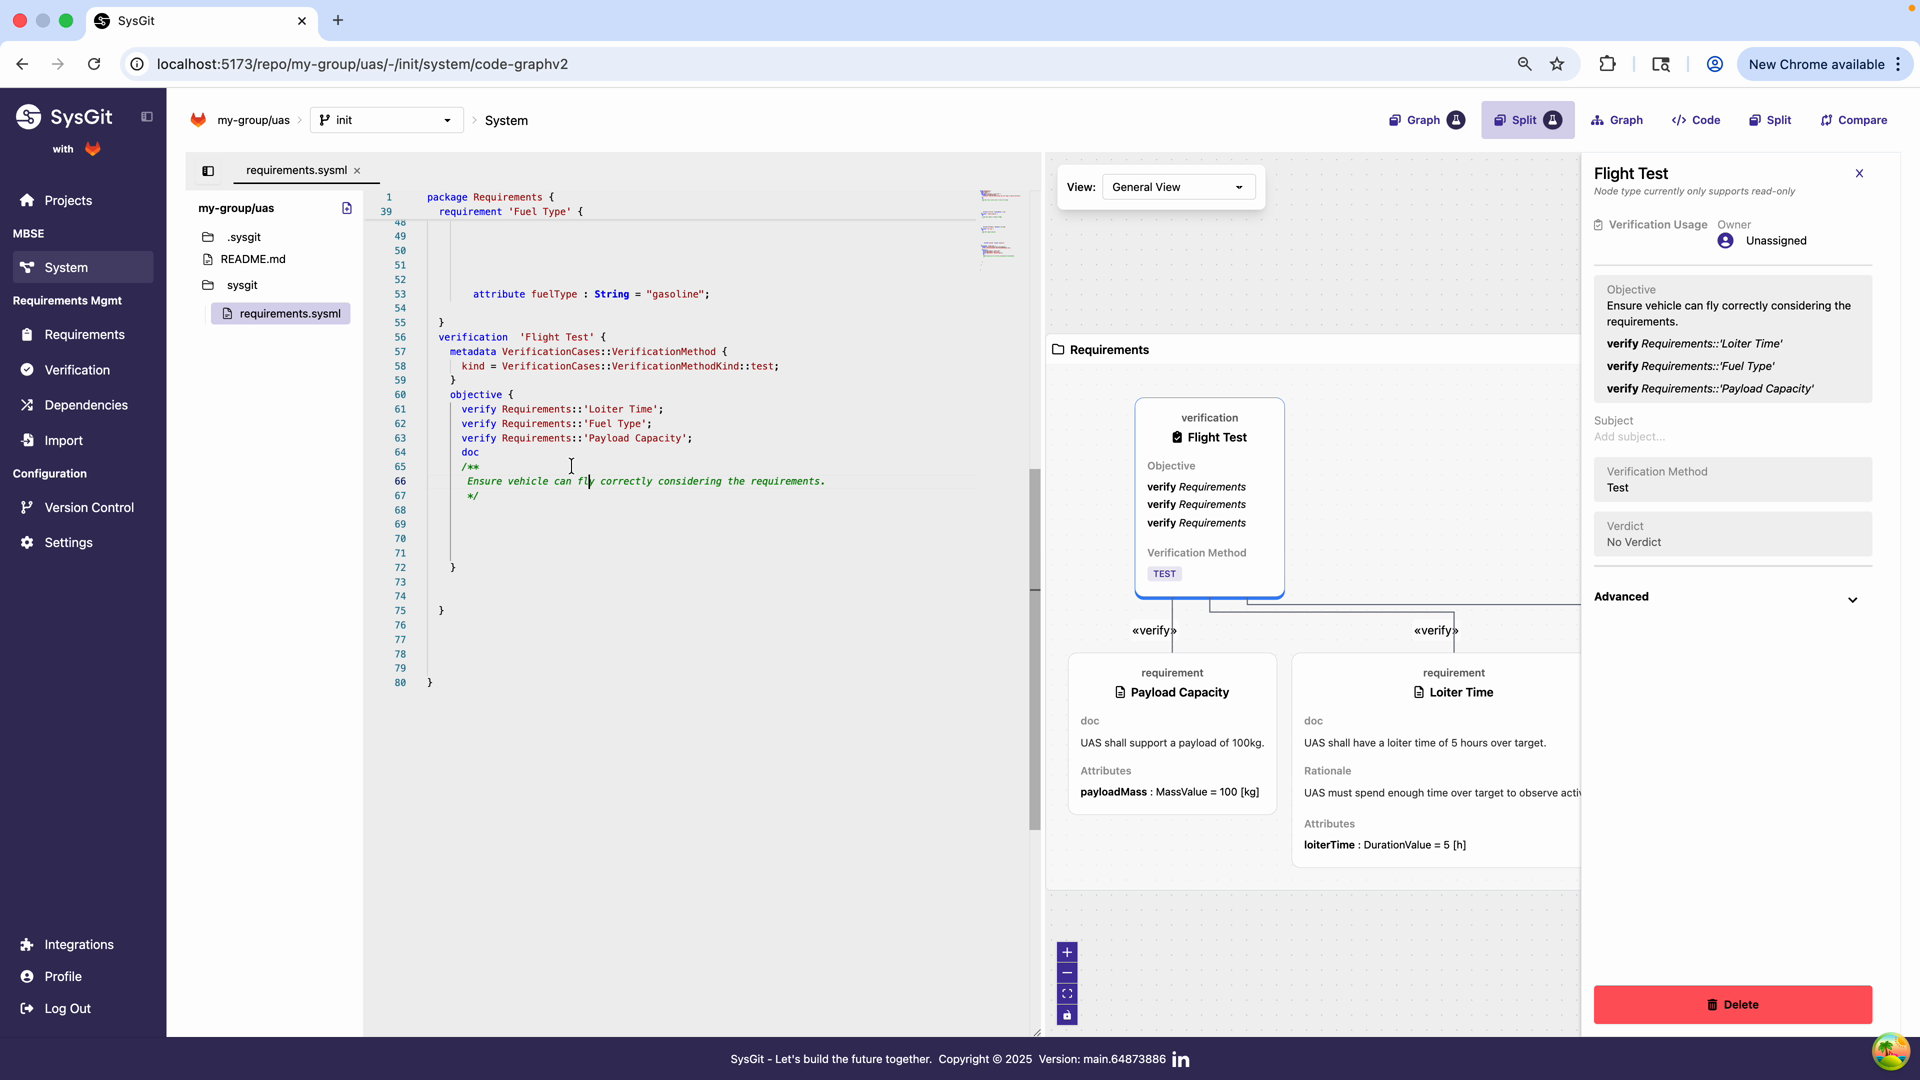
Verification Details Panel#
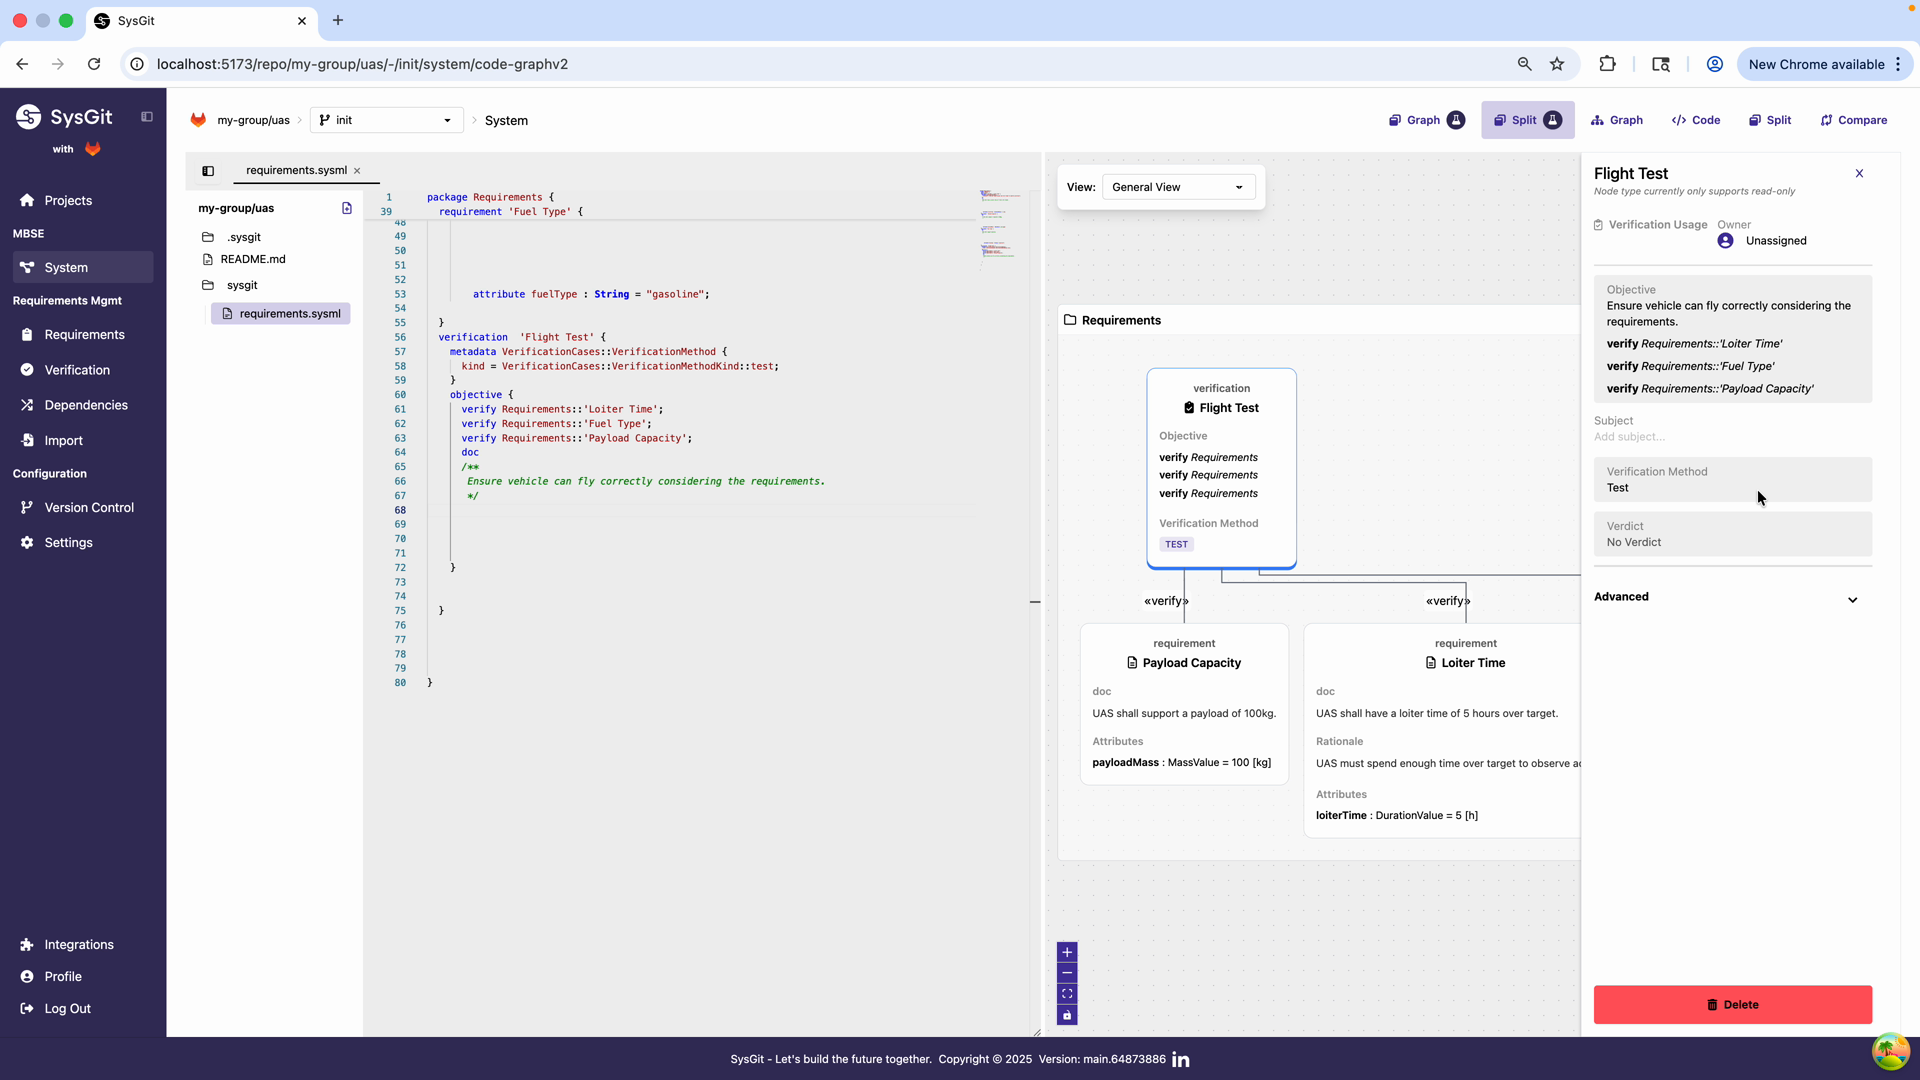
Click on the verification node in the graph to open the details panel on the right side. This panel provides a comprehensive view of the verification object with sections for:
- Verification Usage: Shows assignment status
- Objective: Displays the objective statement and linked requirements
- Verification Method: Shows the selected method (Test)
- Verification Status: Displays verdict (currently "No Verdict")
- Advanced: Additional configuration options
The panel is read-only in the graph view but provides quick access to all verification details. Any edits must be made through the Verifications table or by editing the code directly.
Multi-View Consistency#
SysGit maintains consistency across three views:
- Table View: Spreadsheet-like interface for efficient data entry and bulk management
- Graph View: Visual representation of verification relationships and system structure
- Code View: Direct access to underlying SysML v2 textual notation
Changes made in any view are immediately reflected in all other views. This ensures a single source of truth with no synchronization issues between different representations.
Verification Matrix Reports#
Teams can generate verification matrices showing:
- Which requirements have verification coverage
- Which verifications address multiple requirements
- Gaps in verification strategy
- Status of verification activities
Export capabilities allow generating reports for:
- Design reviews and technical interchange meetings
- Compliance audits and certification activities
- Program management status reporting
- Customer deliverables
Code Representation#
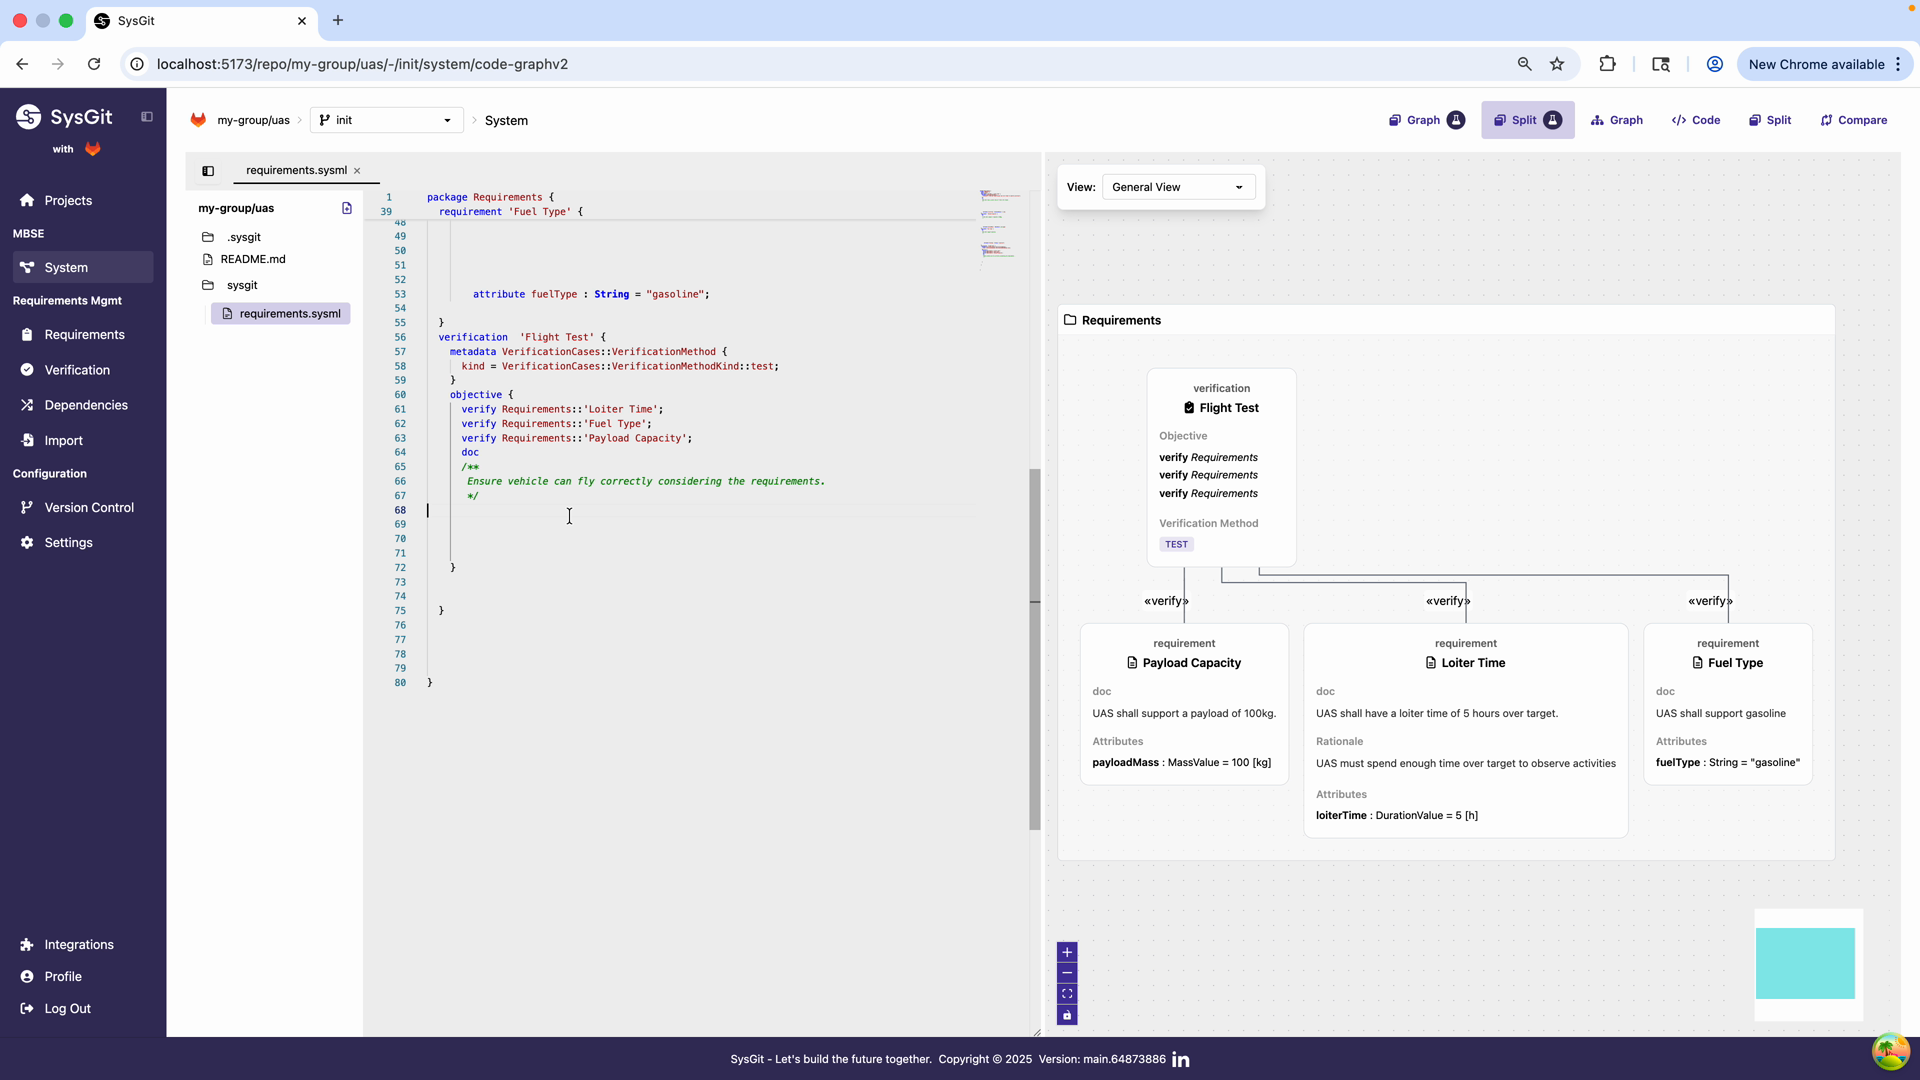
Under the hood, SysGit generates valid SysML v2 code for all verifications. You can view and edit this code directly by clicking the Code button in the toolbar.
The Code view shows the underlying SysML v2 representation of the verification object. The verification is defined in the requirements.sysml file, enabling version control of verification definitions, automated tooling and analysis, integration with other modeling tools, and programmatic access to verification data.
Example SysML v2 Verification:
verification 'Flight Test' {
    objective {
        doc
        /*
         * Ensure vehicle can fly correctly considering the requirements.
         * Test will be conducted at design altitude under standard
         * atmospheric conditions.
         */
        verify Requirements::'Loiter Time';
        verify Requirements::'Fuel Type';
        verify Requirements::'Payload Capacity';
    }

    metadata VerificationCases::VerificationMethod {
        kind = VerificationCases::VerificationMethodKind::test;
    }

    metadata RiskMetadata::Risk {
        totalRisk = RiskMetadata::RiskLevelEnum::medium;
    }
}
Key syntax elements:
verification 'Name': Declares the verification with a descriptive nameobjective: Contains the doc block and verify statementsdoc /* ... */: Describes what and how verification is performedverify Requirements::'Requirement Name': Links to requirements using their declared namesVerificationMethod: Specifies test, analyze, inspect, or demoRisk: Optional metadata for risk level
For complete syntax details, see the SysML v2 Language Reference.
Best Practices#
Consolidate Verification Activities#
Before creating verifications, review all requirements and identify common verification activities. One verification can verify multiple requirements, reducing duplication and management overhead.
Instead of:
- "Maximum Speed Test" verifying speed requirement
- "Fuel Consumption Test" verifying fuel requirement
- "Range Test" verifying range requirement
Create:
- "Performance Flight Test" verifying all three requirements together
Use Descriptive Names#
Verification names should clearly communicate what is being verified and how:
- ✅ "Structural Load Analysis"
- ✅ "Environmental Qualification Test"
- ✅ "Interface Compatibility Inspection"
- ❌ "Test 1"
- ❌ "Verification"
- ❌ "Analysis"
Write Complete Objectives#
A verification objective should enable someone unfamiliar with the project to understand:
- What is being verified
- How it will be verified
- What success criteria apply
- Any special conditions or constraints
Select Appropriate Methods#
Choose verification methods based on:
- Nature of requirements: Physical vs analytical vs design
- Available resources: Test facilities, analysis tools, inspection equipment
- Development phase: Early analysis vs late-stage testing
- Risk and criticality: Higher-risk items may require test over analysis
- Cost and schedule: Balance verification confidence with practical constraints
Maintain Traceability#
Ensure every requirement has at least one verification. Use the graph view to identify:
- Requirements with no verifications (gaps in strategy)
- Verifications with no requirements (potential errors)
- Requirements verified only through low-confidence methods
Keep Results Current#
Update verification results promptly after execution:
- Record outcomes while details are fresh
- Document any deviations or anomalies
- Link to detailed test reports or analysis documentation
- Use version control to track result changes over time
Version Control Integration#
All verification objects are version-controlled alongside requirements and other system elements, providing:
- Complete audit trail: Every change to verification definitions is recorded with author, timestamp, and commit message
- Branching for evaluation: Create verification strategy branches to evaluate different approaches without affecting the main development
- Collaborative planning: Multiple team members can work on verification planning simultaneously with merge capabilities
- Historical tracking: Trace how verification strategies evolved and when results were updated
- Reproducibility: Check out any historical commit to see the exact verification state at that point in time
See Also#
- Requirements Management - Managing requirements that verifications validate
- Traceability - Verification matrices, coverage analysis, and traceability reports
- System Modeling - System elements that satisfy and implement requirements
- SysML v2 Language Reference - Complete verification syntax and examples